客户端开发 | figma 基础使用
资源
可以考虑的工具或模板:
mobile UI 设计|figma 社区 中各种 ios ui 组件
插件:
- UXPilot - AI 配色助手
As an expert in UI design, I would like you to develop a collection of Pastel Colors that adhere to the specified criteria and the details provided in the product description below.

Criteria:

1. Limit the design to a maximum of 4 colors.
2. Integrate gradient colors into the color palette.
3. Display the HTML code for each color.

Product Description:

1. The application under development serves as a functional tool exclusively for Personal Watercraft (PWC) users.
2. The PWC logo has been attached for reference purposes. Please consider it while creating the color scheme.
- Mini Magic Moodboard and Art Generator - 根据颜色生成背景涂鸦
技巧
auto layout(容器根据内部内容自动更换长宽,元素间距及排版):
- 文字与形状同时选择,而后点击 autolayout;
- 当容器内有多个 content 时,可以设置 content 之间的内间距。
玻璃拟态(磨砂玻璃的效果):
- 添加矩形,设置 background blur + 投影 + stride 渐变 + 透明度
快捷蒙版:
- 同 PS 当中的快捷蒙版,sigma 中可以可以 Frame 来限定元素展现的范围。
色彩提取:
- 快捷键
i
Document Style
style 可以看成变量,大致使用逻辑为:
- 在 figma 页面定义好你的
主题色,可以将主题色先设置为红色。 - 而后让你的元素使用
主题色,这时候你的元素会显示红色。 - 修改
主题色为绿色后,所有使用主题色的元素都会显示为绿色。
如果要配置 style 颜色。如下图,点击 Libraries 中的 添加符号 +。而后添加 style 颜色。
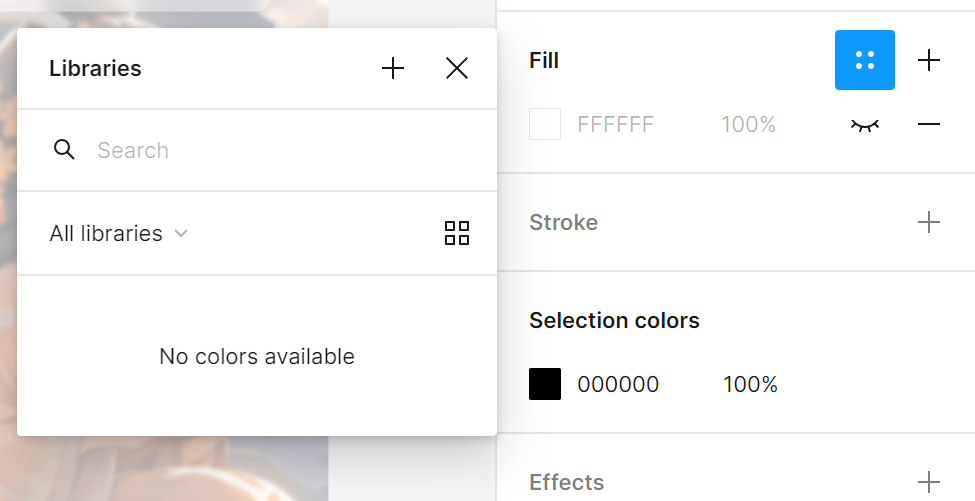
当然除了添加颜色为 style,也可以为 style 设置 effects,字体风格等。
Components
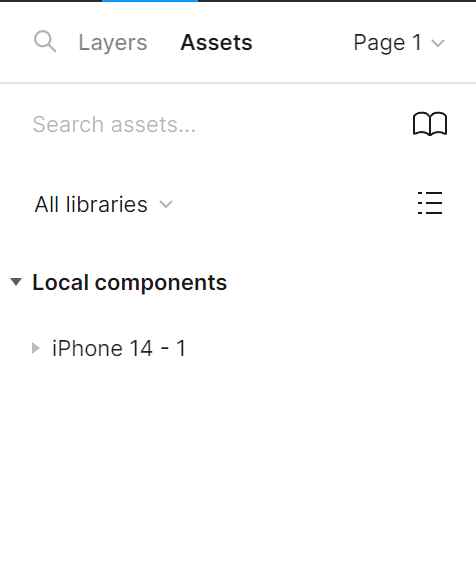
创建组件后,组件可以通过复制粘贴实现复用。要批量编辑组件时,可以通过修改父组件,来对全部字组件进行样式修改。
选择几个元素,点击花瓣按钮 create component。父元素显示为花瓣按钮,子元素显示为矩形。
对于每一个子组件,可以在右侧点击 frame 里的 go to main componment 来跳转到父组件。

提示
通常我们会将所有的父组件单独放在一页中。我们可以在左侧 asset 当中查看并使用组件。
交互和 prototype
prototype 基础
该功能可以模拟实现手机的页面跳转效果。
- 点击元素,然后点击右边栏的 prototype。元素会出现 + 号。

- 点击 + 号选择链接对象。之后点击连接线,可以设置触发条件(如 on tap 等)和动画特效(如 css 中的 transition)。
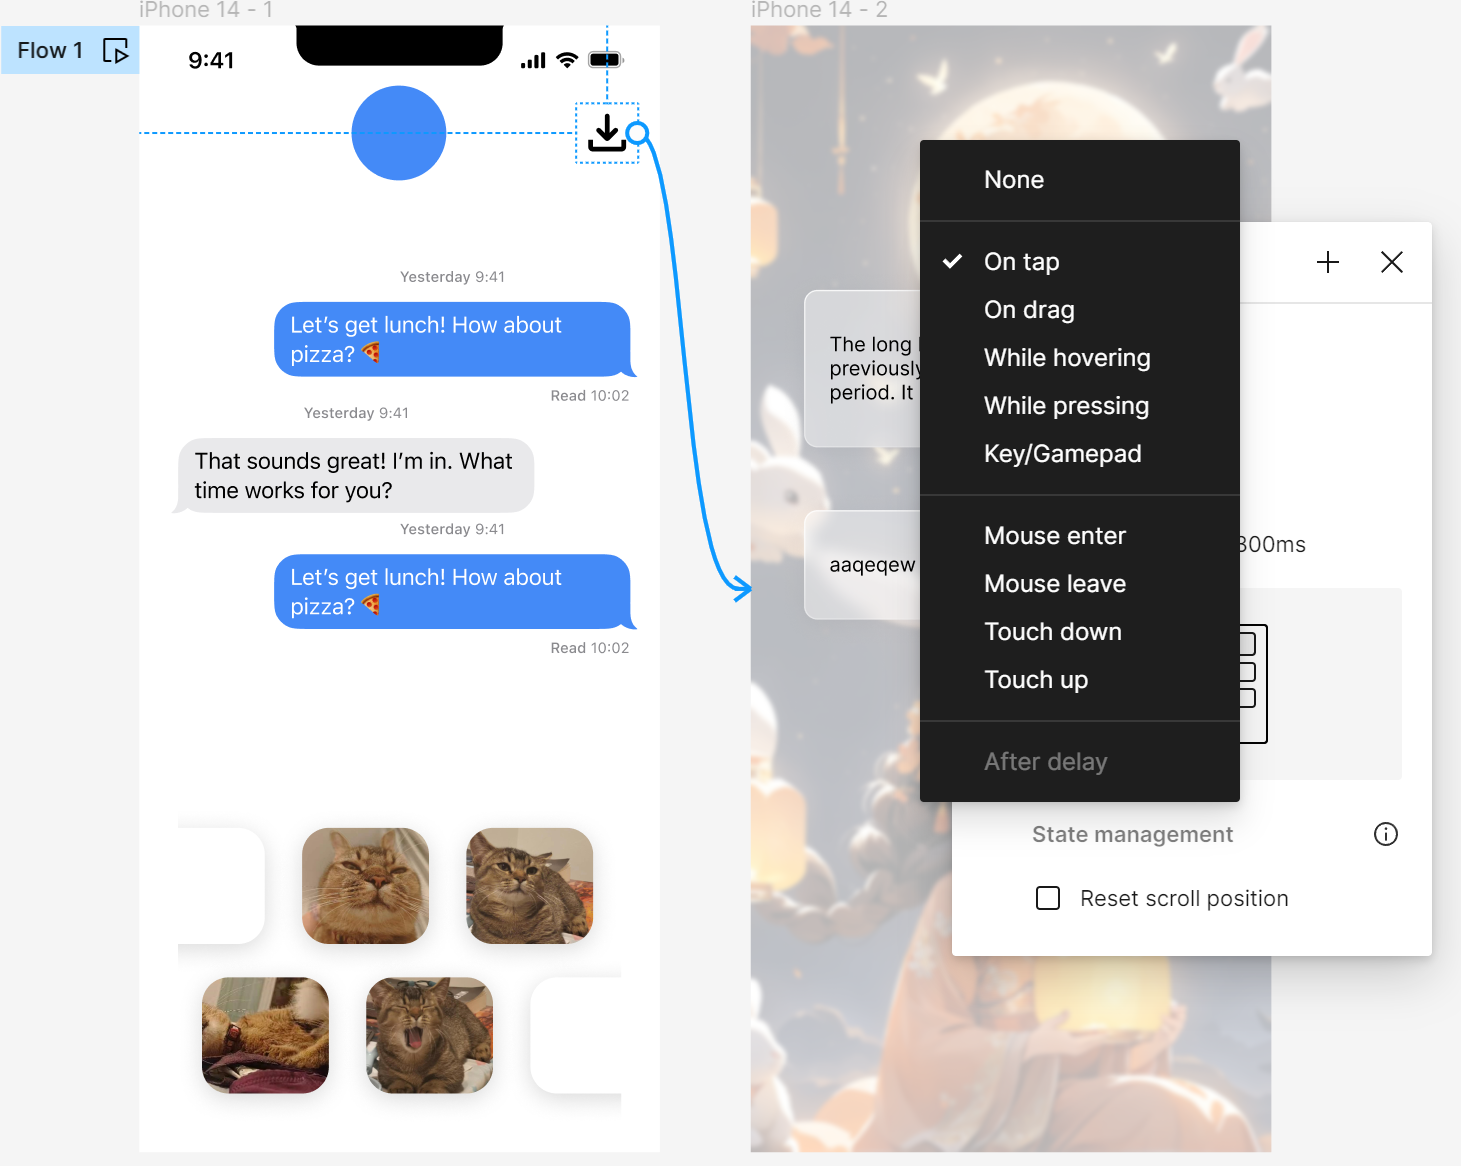
- 完成后点 左上角的 flow 播放键,可以进入到模拟手机页面
- 当然,interations 也可以选择 nav back。
提示
- figma 一般用于制作简单的页面跳转,如果需要高级特效,可以考虑使用 protopie 等其他工具。
- 每一个页面都可以是一个 flow 的 start 流程,我们可以将不同的业务线设置成不同的 flow,方面我们 debug。 点击页面,然后在右侧 Prototype 选择点击 Flow start point,就可以添加新的 flow 了。
遮罩与提示框
- 创建新页面 “遮罩”,设置 fill 为 none。
- 创建 prototype 链接,选择样式为 open overlap
- 在 “遮罩” 页面添加对话框,消息框等。可以通过设置透明度来实现。
页面滚动
前面介绍到,当一个 frame 中的 content 不在 frame 里时,超出 frame 范围的 content 会被隐藏掉。
- 我们可以在 frame 的 prototype 当中选择 scroll 选项(设置水平滑动或者垂直滑动),来定义进行 flow 时候,页面是否可以进行滑动。
- 可以在 prototype 中设置页内跳转。比如返回顶部特效。
网页设计
推荐尺寸:1280 * 720
栅格
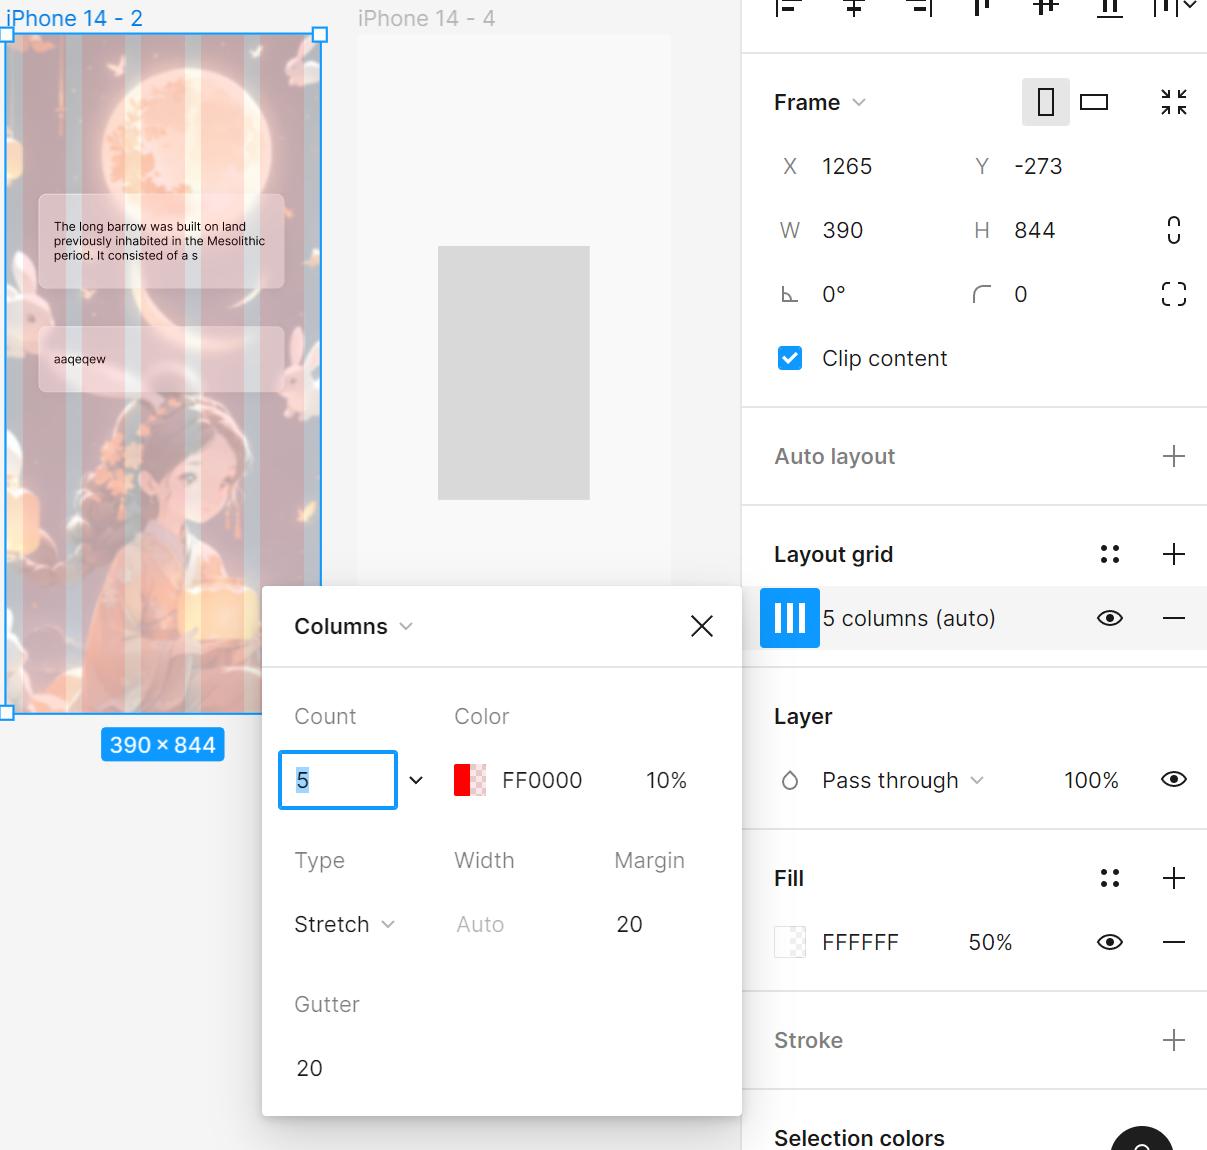
栅格是一些辅助线,在设计网页时候起到参照作用。
Layout Grid 中可以选择配置栅格,比如选择 layout grid 类型为 columns,然后设置相关参数:
网页动态响应
Design 中可以设置 constraints,来对不同尺寸的页面进行大小配置。这样不同大小的设备,都可以有好的视觉效果。
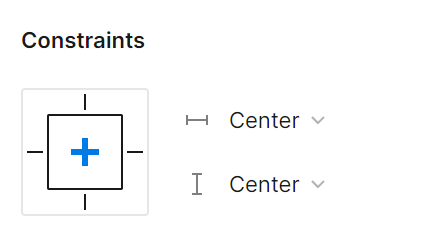
以上设置,不论页面多大,该元素总是居中。Constraints 也可以设置 scale 等其他方案。
Figma2Code
flex 布局
CSS 中 Flex 布局与 figma 中 autolayout 相似。可以根据方向等提供灵活布局。参数包括
flex-direction:默认为row,从左往右布局。row-reverse(右往左),column/column-reverse,垂直布局。flex-wrap:默认nowrap不换行。wrap,换行。wrap-reverse:换行但第一行在最下面。flex-flow:以上两者的缩写,可以写成如row nowrapjustify-content:flex-start左对齐,flex-end右对齐,center,space-between两端对齐,item 之间的间隔相等,space-around,item 两侧的间隔相同。align-items(单根轴线):flex-start,flex-end,center(分别根据轴线起点、终点、中心对齐),baseline,stretch(默认值,将 item 的高度配置为容器高度)align-content(多跟轴线):相对于align-items,对了space-between,space-around
Figma 中 auto layout 中的一些选项可以直接对应到 flex 设置中,使用官方的 dev 工具时,采用 autolayout 设置后,可直接生成对应的 flex css 代码。
flex 中 item 的 css 属性:
order: 项目排列顺序,0 排最前面flex-grow:默认为 0,如果存在空间也不放大。flex-shrink:默认为 1,如果空间不够,就缩小。flex-basis:???flex:前三者的缩写,如0 1 autoalign-self:改变这个 item 在容器中的对齐方式,不影响其他 item
autolayout 容器布局
display: flex;
width: 24.375rem;
padding: 0rem 1.0625rem;
justify-content: center;
align-items: center;
gap: 1.3125rem;